
Scheduled release lets you control which workouts your athletes can see while you keep building their plan behind the scenes. You choose what to reveal, and everything else stays hidden until you're ready. This is useful when you want to plan several weeks ahead but only want your athlete focused on the sessions in front of them.
This guide walks you through opening scheduled release and using all three visibility options.
Open Scheduled Release
Step 1: Open the Scheduled Release Modal
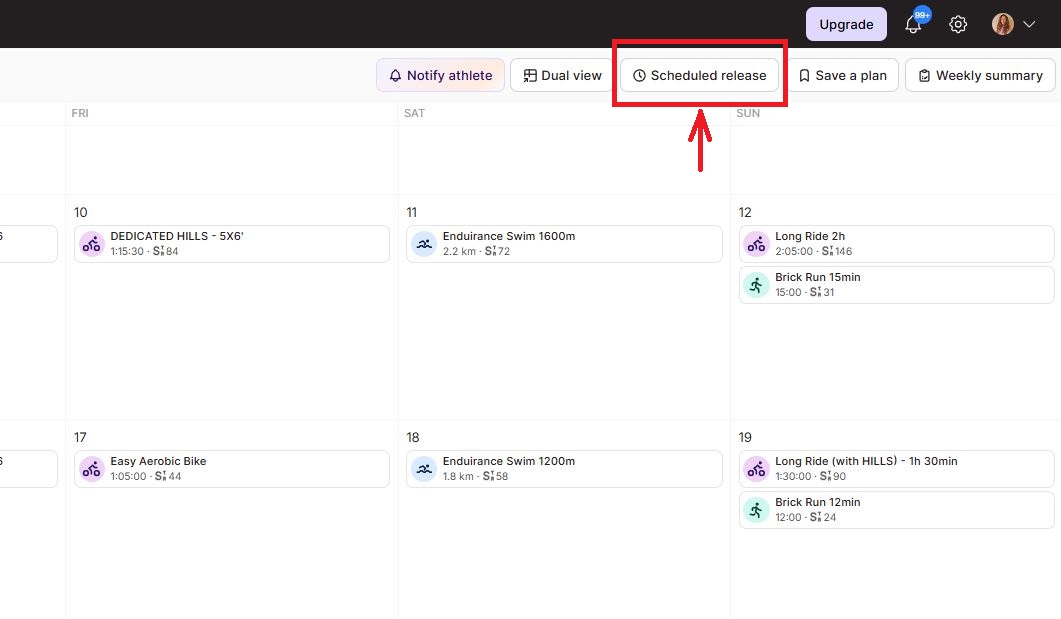
Go to your Calendar and find the Scheduled release button in the toolbar at the top right, next to Dual view and Save a plan. Click it to open the Scheduled release modal.
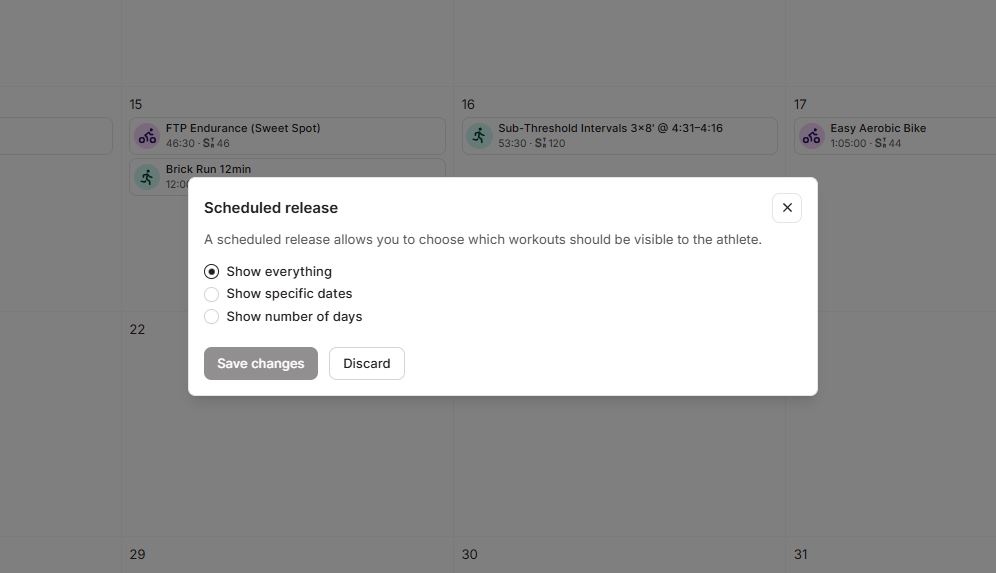
The modal opens with a short description and three visibility options: Show everything, Show specific dates, and Show number of days.
Step 2: Choose a Visibility Option
Pick the option that matches how you want to control your athlete's view. Each option changes what appears below it in the modal.
- Show everything makes your full calendar visible to the athlete.
- Show specific dates reveals only the workouts inside a date range you choose.
- Show number of days reveals a rolling window of upcoming days that moves forward automatically.
The next three sections cover each option in detail.
Option 1: Show Everything
Select Show everything when you want your athlete to see the entire calendar with no workouts hidden. This is the default state and the simplest option.
With this selected, every workout you've scheduled is visible to the athlete. Click Save changes to apply, or Discard to close without changing anything.
Option 2: Show Specific Dates
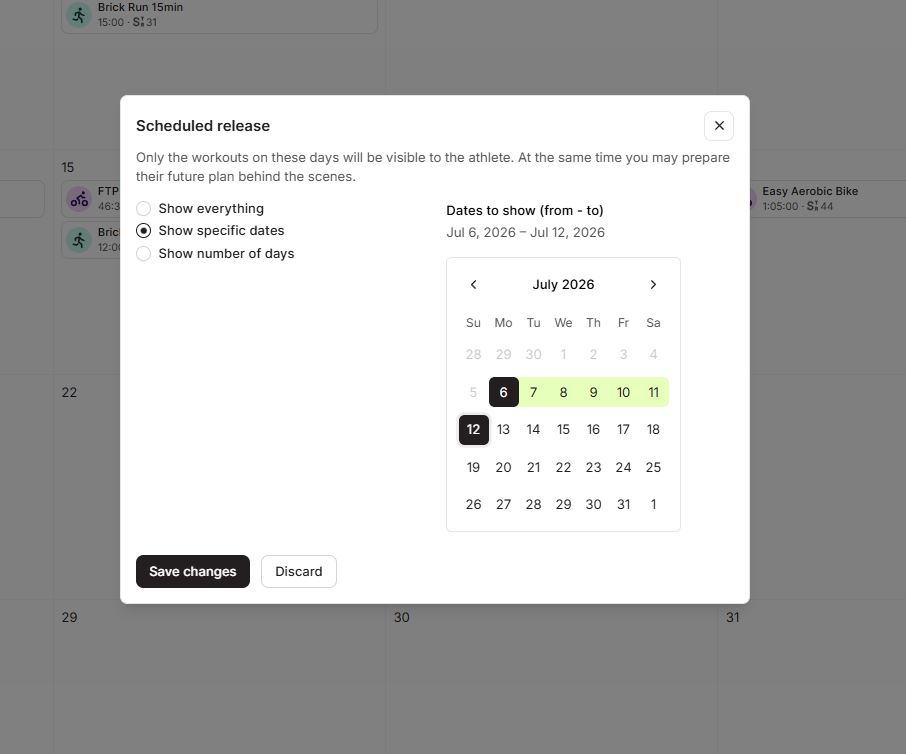
Select Show specific dates when you want to reveal a fixed date range and keep everything outside it hidden. Only the workouts on the days you choose will be visible to the athlete, and you can keep preparing their future plan behind the scenes.
Under Dates to show (from - to), use the calendar to pick your start and end dates. The selected range highlights on the mini calendar, and the chosen dates appear above it. Click Save changes to apply the range.
Option 3: Show Number of Days
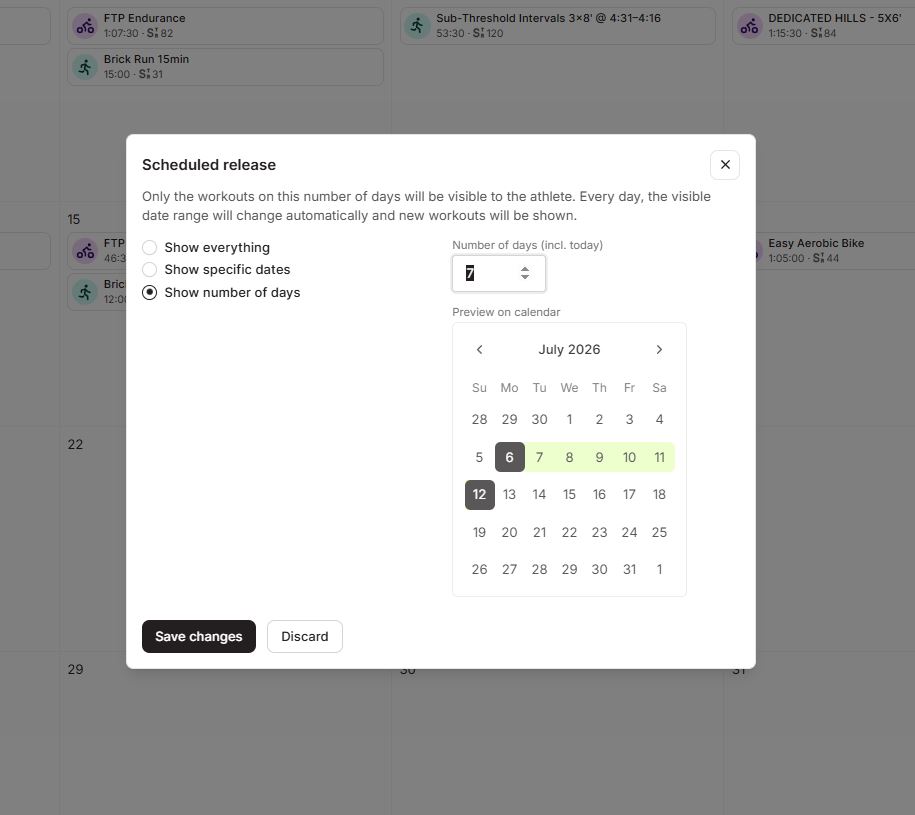
Select Show number of days when you want a rolling window instead of fixed dates. Only the workouts within this number of days will be visible to the athlete, and the visible range moves forward automatically every day so new workouts appear on their own.
Enter a value in the Number of days (incl. today) field. The count includes today, so a value of 5 shows today plus the next four days. The Preview on calendar below shows which days the athlete will see. Click Save changes to apply.
What Your Athletes See
Your athlete only sees the workouts inside the range you released. Everything outside it stays hidden from them while you continue to build and edit it.
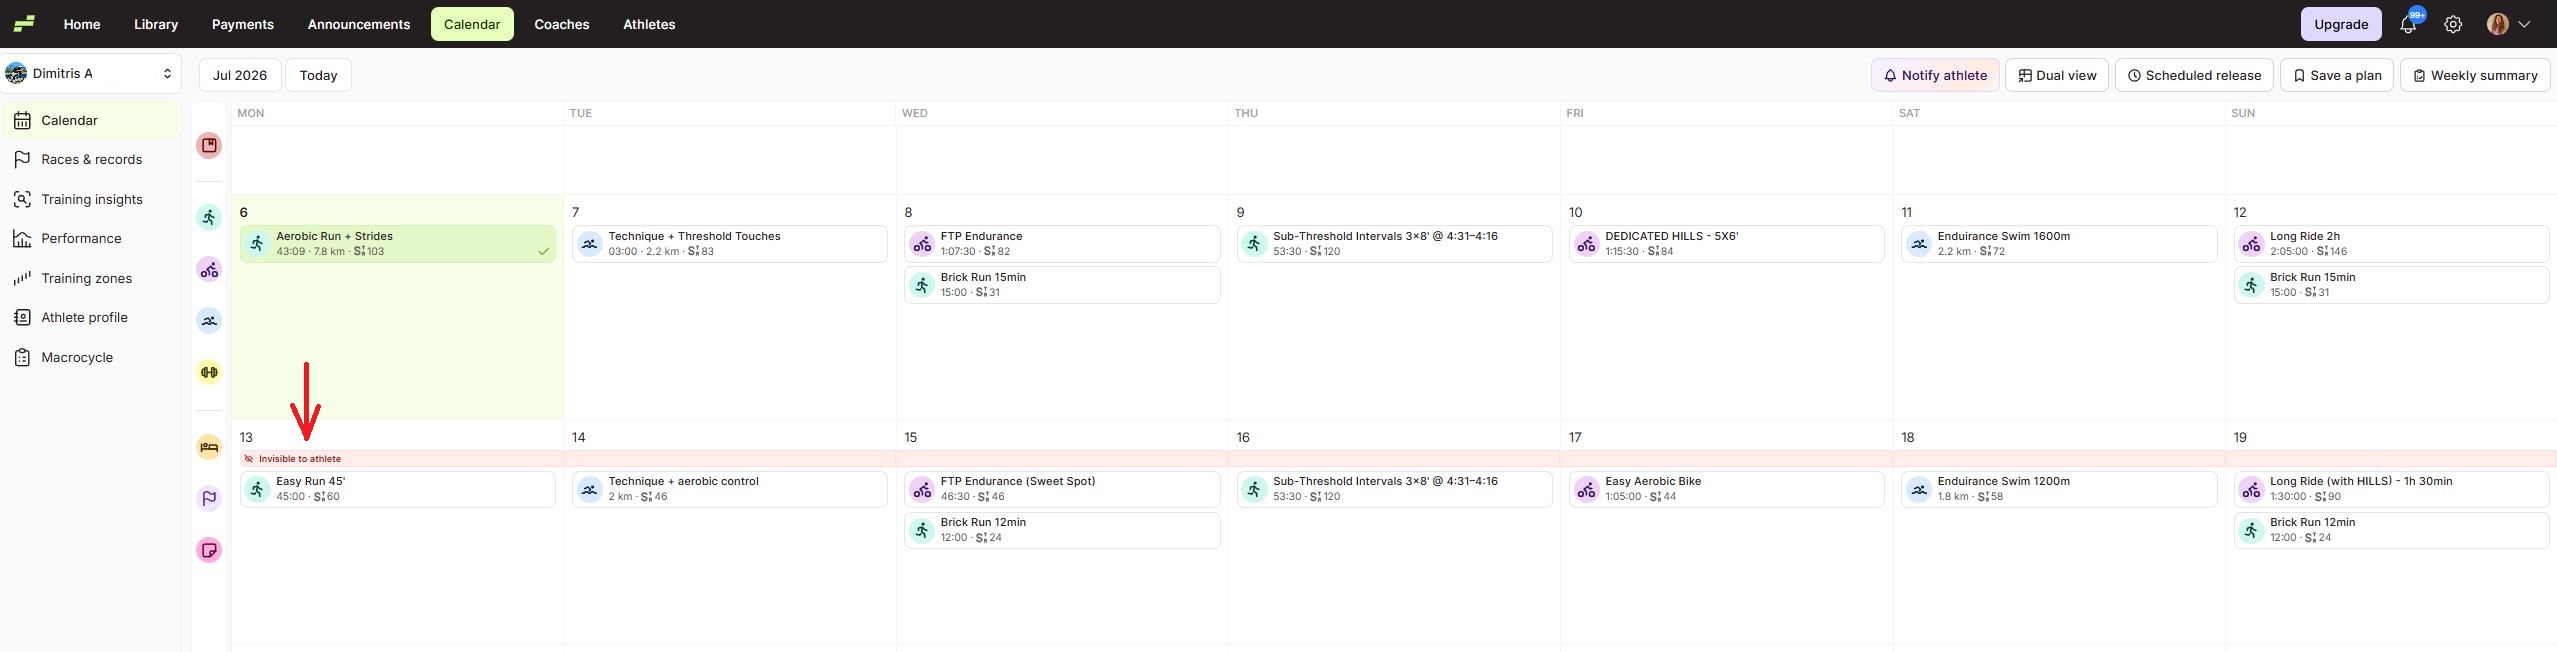
On your own calendar, hidden rows are marked with an Invisible to athlete banner so you always know what your athlete can and can't see. The workouts are still fully visible to you, so you can keep planning ahead without revealing anything early.
Tips for Coaches
- Use Show number of days for steady day-to-day focus. A rolling window keeps your athlete looking at the next few sessions instead of the whole plan, and it advances on its own so you never have to update it manually.
- Use Show specific dates for blocks and events. When you want to release a training block or the weeks leading into a race, a fixed range gives you precise control over the start and end.
- Watch for the Invisible to athlete banner. It's your quick check that upcoming work is still hidden. If you expected a session to be visible and see this banner, adjust your release range.
- Build ahead without worry. Scheduled release lets you plan weeks in advance while your athlete stays focused on what's in front of them. Edit future weeks freely knowing they stay hidden until released.
- Switch back to Show everything anytime. If you want to open up the full plan, reopen the modal, select Show everything, and save. Nothing in your calendar is lost by changing options.
Need help? Contact us at Support & Feedback or browse the Knowledge Base.