
The Training Arc is the plan above the plan. Give it a goal date and a few basics, and EndoGusto lays out the whole stretch between now and race day: the phases (Base, Build, Peak, Taper, Transition), the loading rhythm, and the weekly volume targets per sport. Every number the Arc proposes is a starting point, and all of it is yours to edit.
This guide walks you through creating a Training Arc for an athlete, applying it, and tracking weekly progress on the calendar.
Open the Training Arc Tab
Step 1: Select the Athlete and Open Training Arc
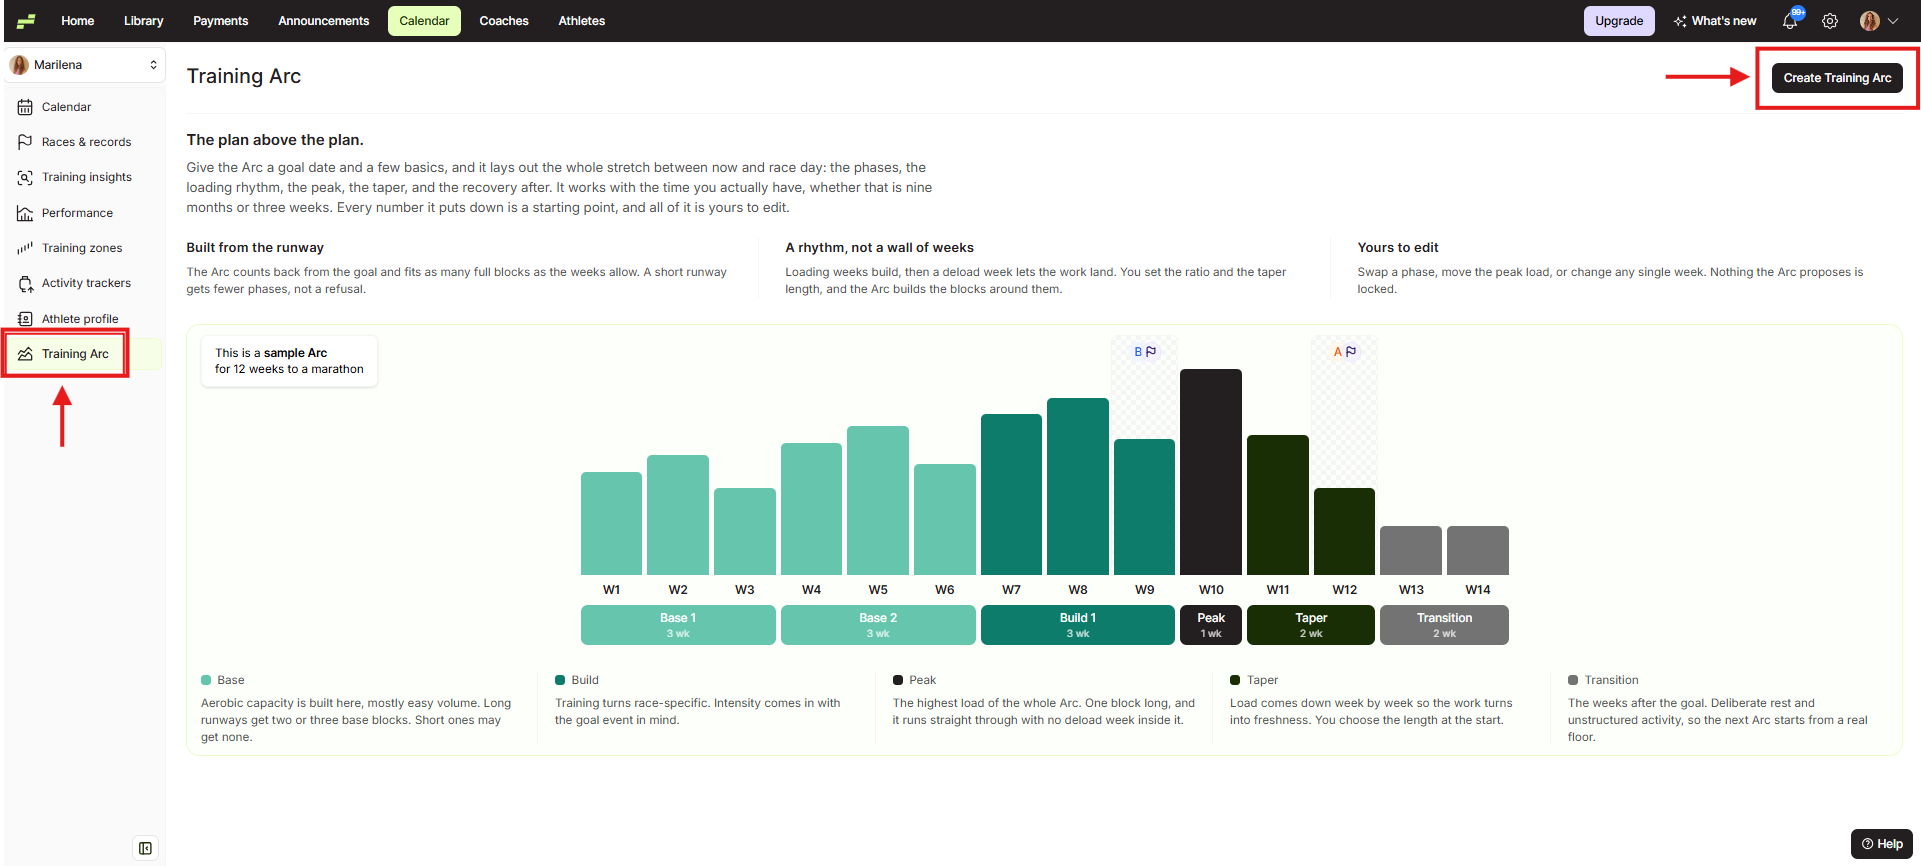
Go to your Calendar and select the athlete from the athlete selector at the top left. In the athlete sidebar, click Training Arc.
The first time you open the tab, EndoGusto shows a short explainer with a sample Arc and its phases. Click the "Create Training Arc" button at the top right to start.
Set the Goal of the Arc
Step 2: Choose a Goal Type
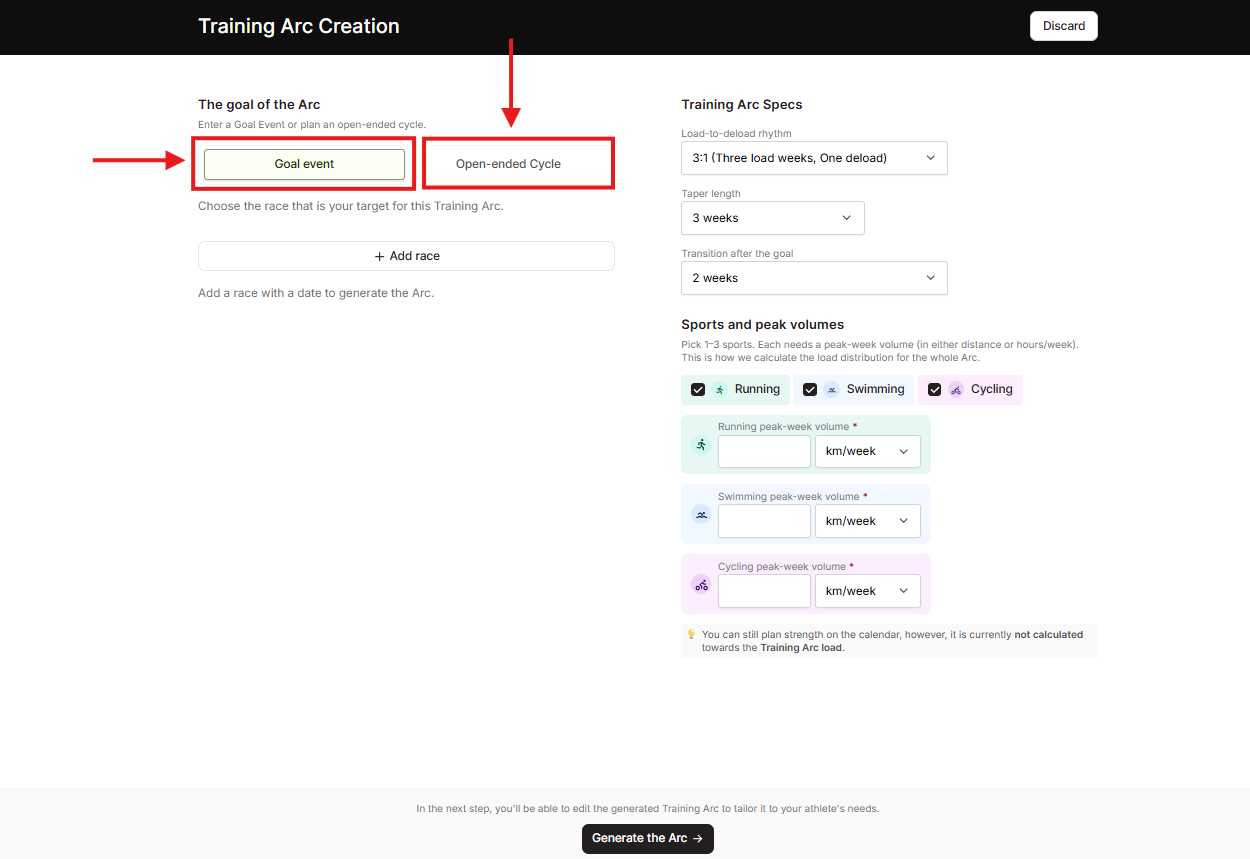
The Training Arc Creation page opens. Under "The goal of the Arc", choose one of two options:
- "Goal event": build the Arc backward from a target race.
- "Open-ended Cycle": build a cycle with no race attached, defined only by its length and starting date.
Step 3: Set a Goal Event
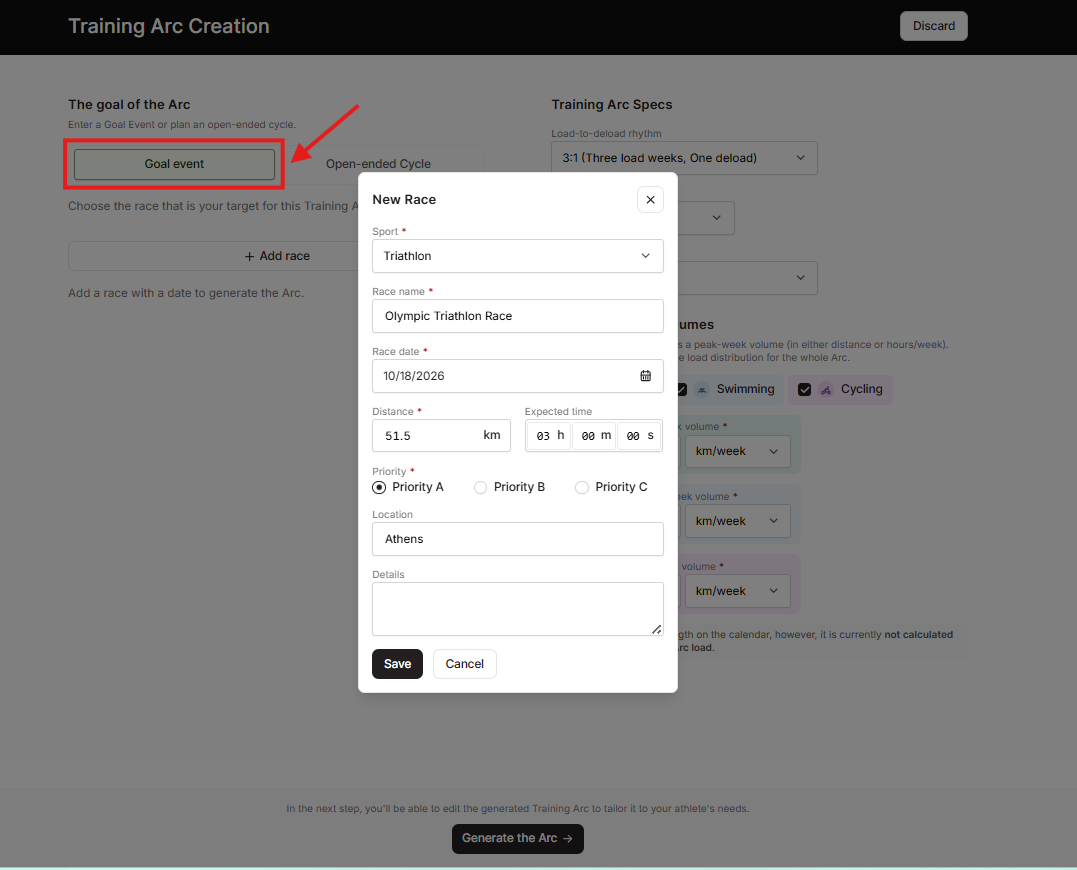
With "Goal event" selected, choose the race that is the target for this Training Arc from the athlete's race list. The selected race shows a Target badge, and the page displays how many weeks remain to the goal.
If the race isn't listed yet, click "+ Add race". The New Race form opens with fields for Sport, Race name, Race date, Distance, Expected time, Priority (Priority A, Priority B, or Priority C), Location, and Details. Fill in the required fields and click "Save". The race is added to the list and you can select it as the target.
Step 4: Or Set an Open-Ended Cycle
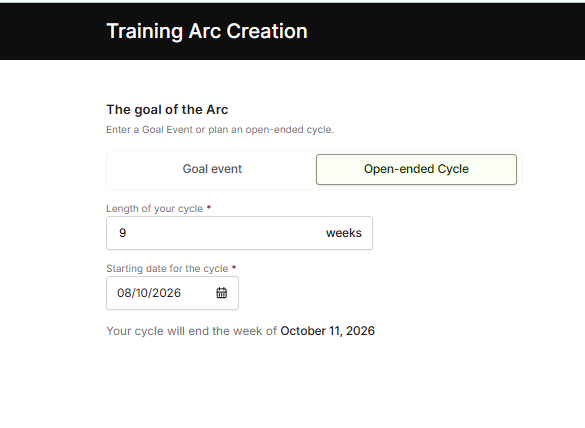
With "Open-ended Cycle" selected, enter the "Length of your cycle" in weeks and pick the "Starting date for the cycle" from the date picker. Use this option for base periods, off-season blocks, or any stretch of structured training without a race at the end.
Configure the Training Arc Specs
Step 5: Set the Rhythm, Taper, and Transition
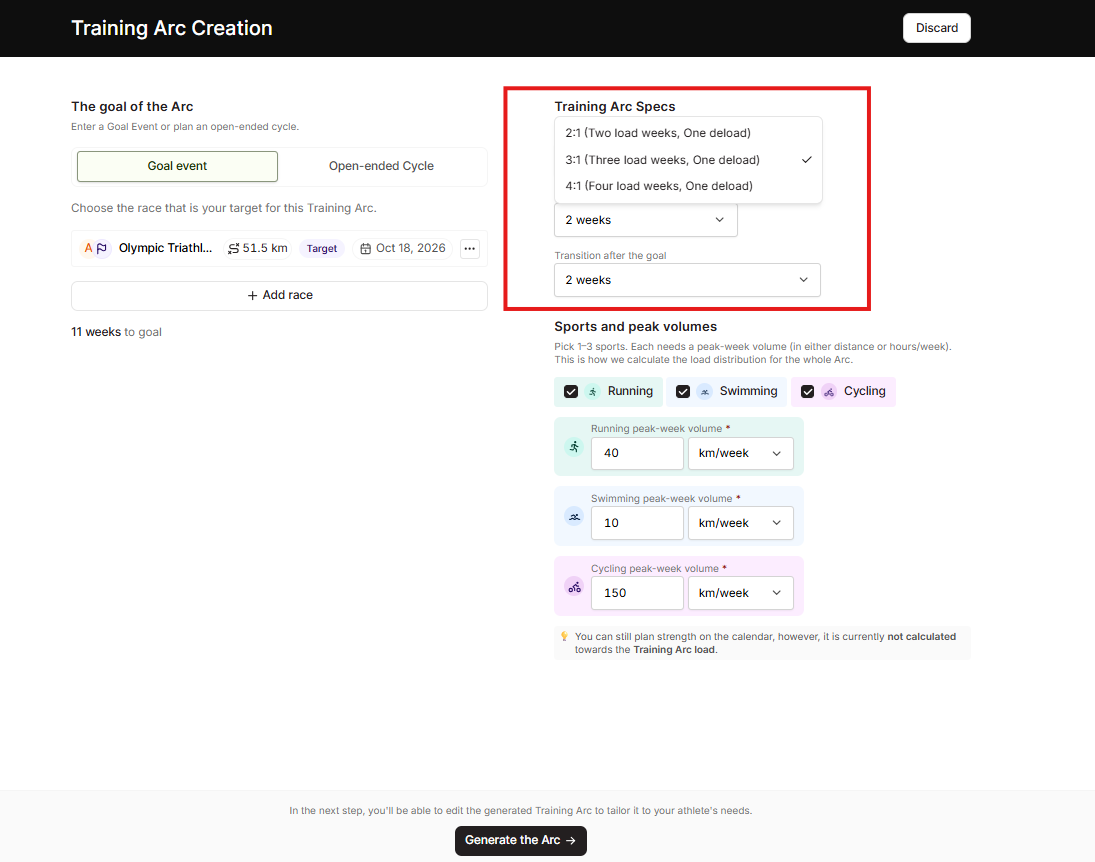
On the right side of the page, the Training Arc Specs section controls how the Arc structures its weeks:
- "Load-to-deload rhythm": how many loading weeks come before each deload week, for example 3:1 (Three load weeks, One deload).
- "Taper length": how many weeks the load comes down before the goal, from 0 to 4 weeks.
- "Transition after the goal": how many recovery weeks follow the goal event.
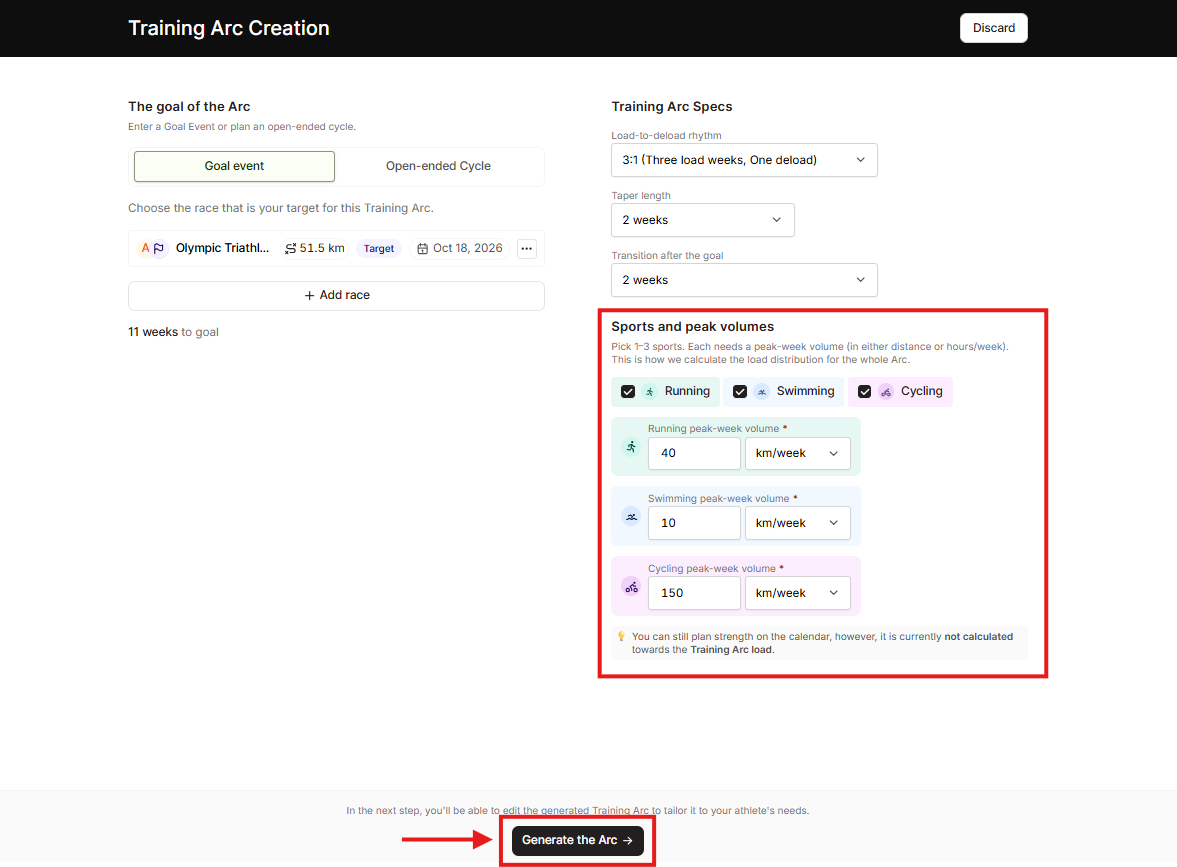
Step 6: Pick Sports and Peak Volumes
In the "Sports and peak volumes" section, check 1 to 3 sports: Running, Swimming, or Cycling. Each selected sport shows a peak-week volume field, such as "Running peak-week volume", with a unit dropdown next to it. Enter the highest weekly volume you want the Arc to build toward for each sport. This is how EndoGusto calculates the load distribution for the whole Arc.
You can still plan strength on the calendar; however, strength is currently not calculated toward the Training Arc load.
When everything is set, click "Generate the Arc" at the bottom of the page. To leave without creating an Arc, click "Discard" at the top right.
Review and Apply the Arc
Step 7: Review the Generated Arc
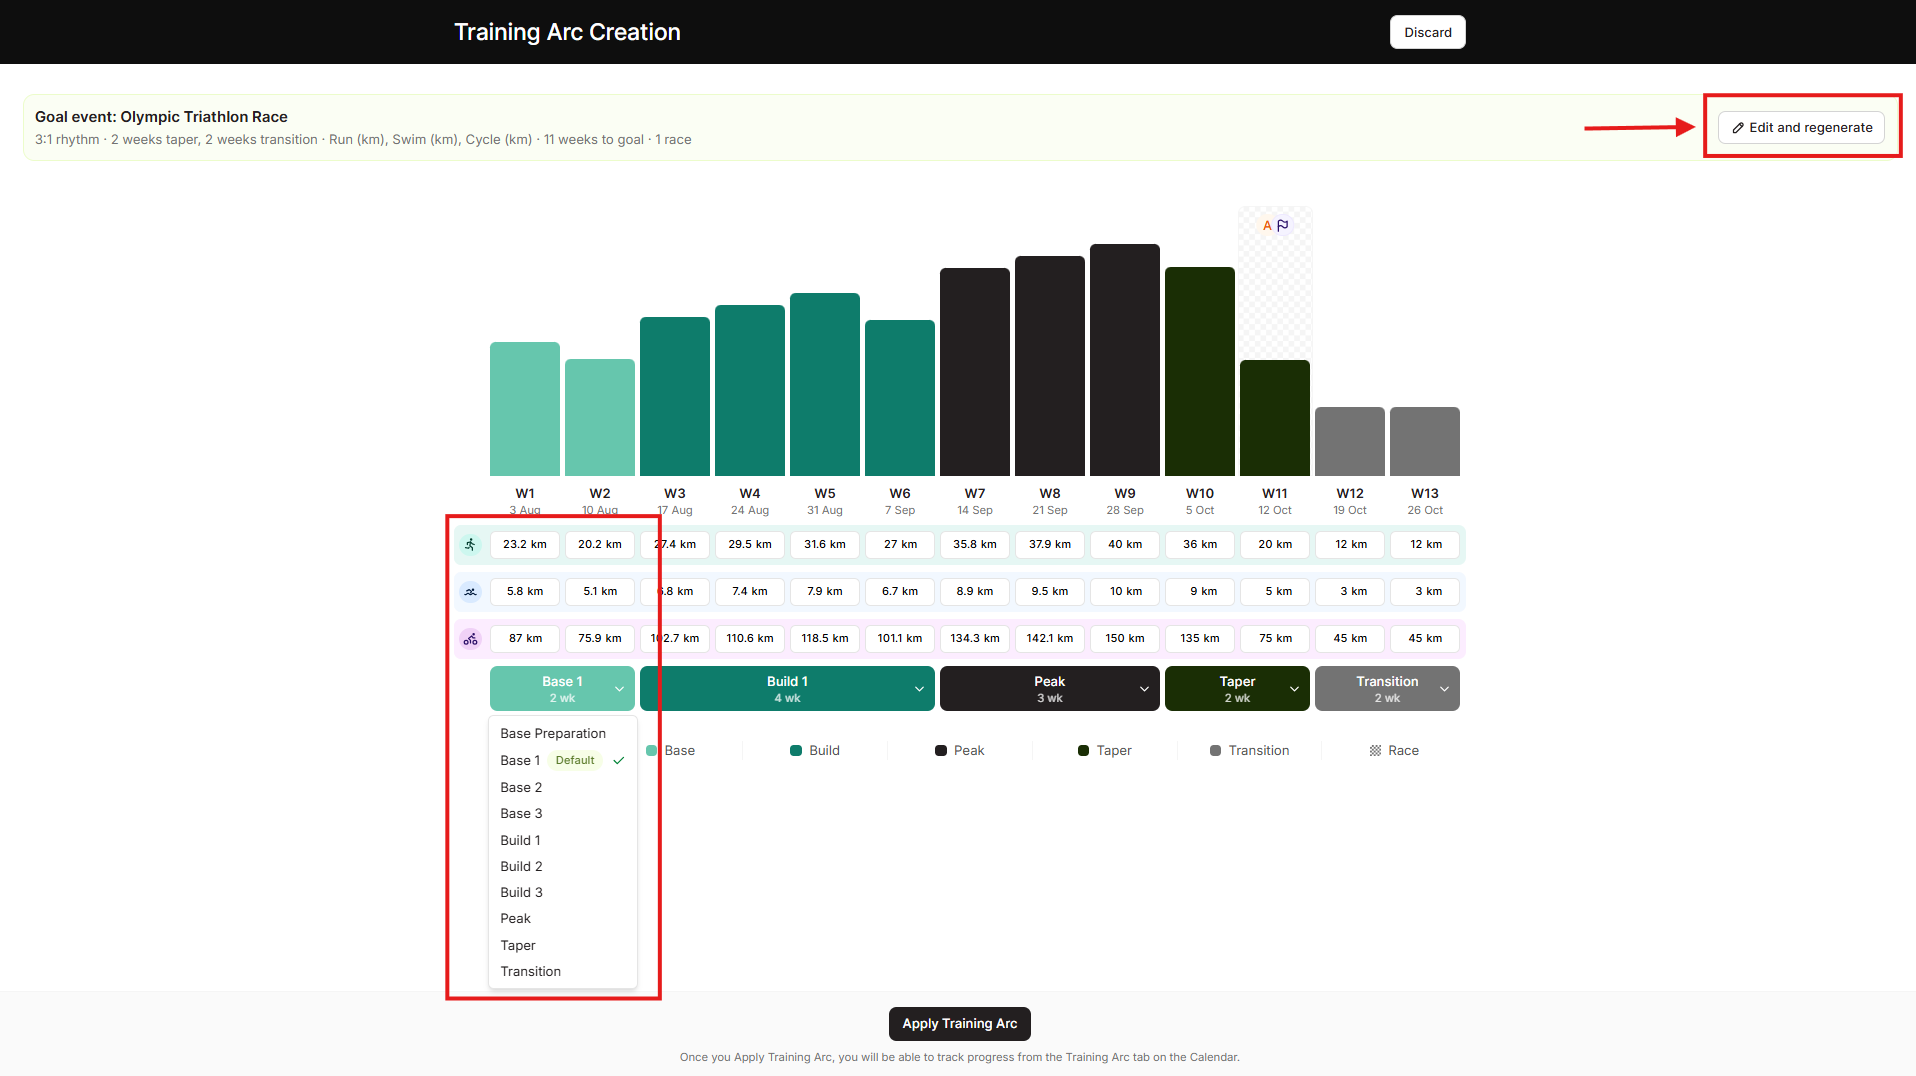
EndoGusto generates the full Arc and shows it as a week-by-week chart. A summary bar at the top recaps the goal, rhythm, taper, transition, sports, and weeks to goal. Below the chart, each week lists its volume per sport, and the phase blocks (Base, Build, Peak, Taper, Transition) show how the weeks are grouped.
Every weekly volume value is editable. Click any value and type a new number to fine-tune a specific week. To change the underlying setup instead, click "Edit and regenerate" at the top right. This takes you back to the previous Training Arc Creation page with all your entries in place, so you can adjust the goal, rhythm, sports, or peak volumes and generate the Arc again.
Step 8: Apply the Training Arc
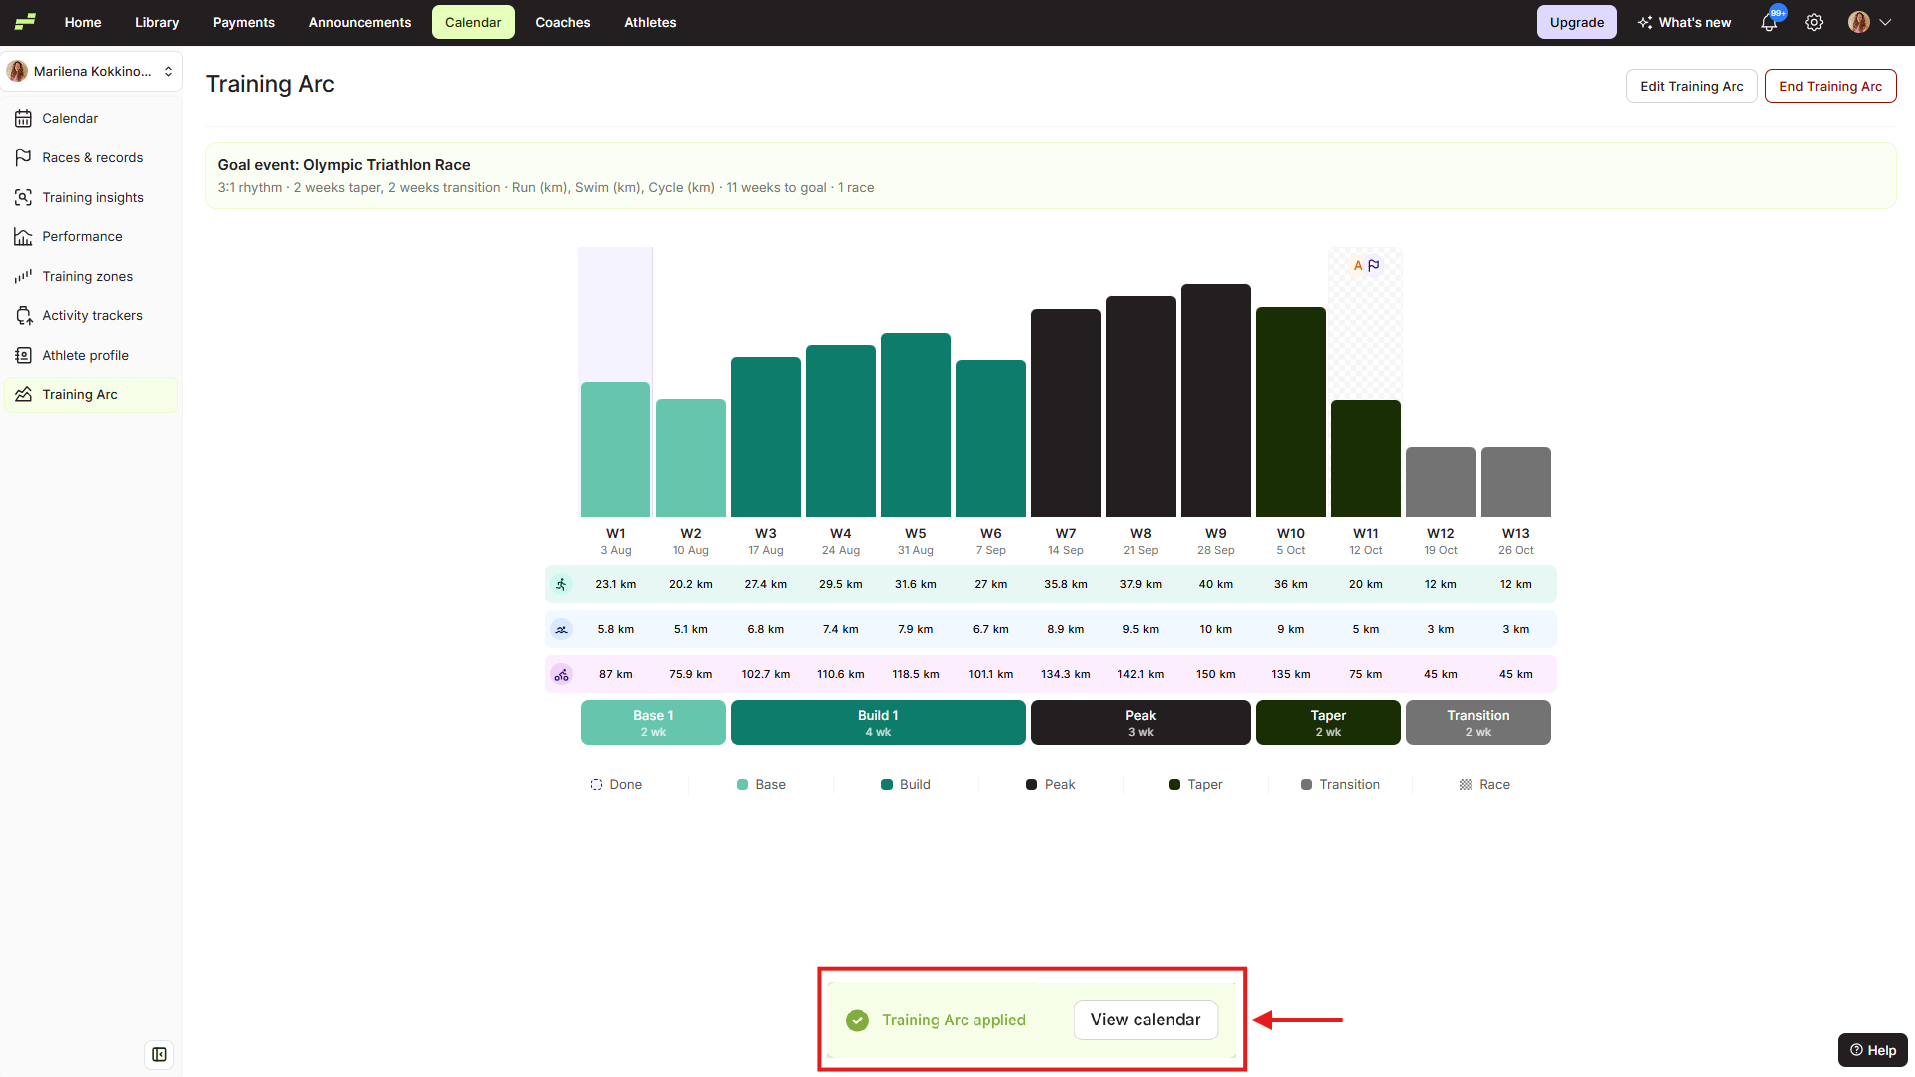
When the Arc looks right, click "Apply Training Arc" at the bottom of the page. A "Training Arc applied" confirmation appears with a "View calendar" button, and the Arc now lives in the athlete's Training Arc tab.
From this tab you can click "Edit Training Arc" to make changes or "End Training Arc" to close the Arc out.
Track Training Arc Progress on the Calendar
Step 9: Open the Training Arc Panel
Once the Arc is applied, schedule the athlete's workouts on the calendar as usual, from scratch, from your Library, or by assigning a training plan. The Arc then tracks how your scheduled work compares to its targets.
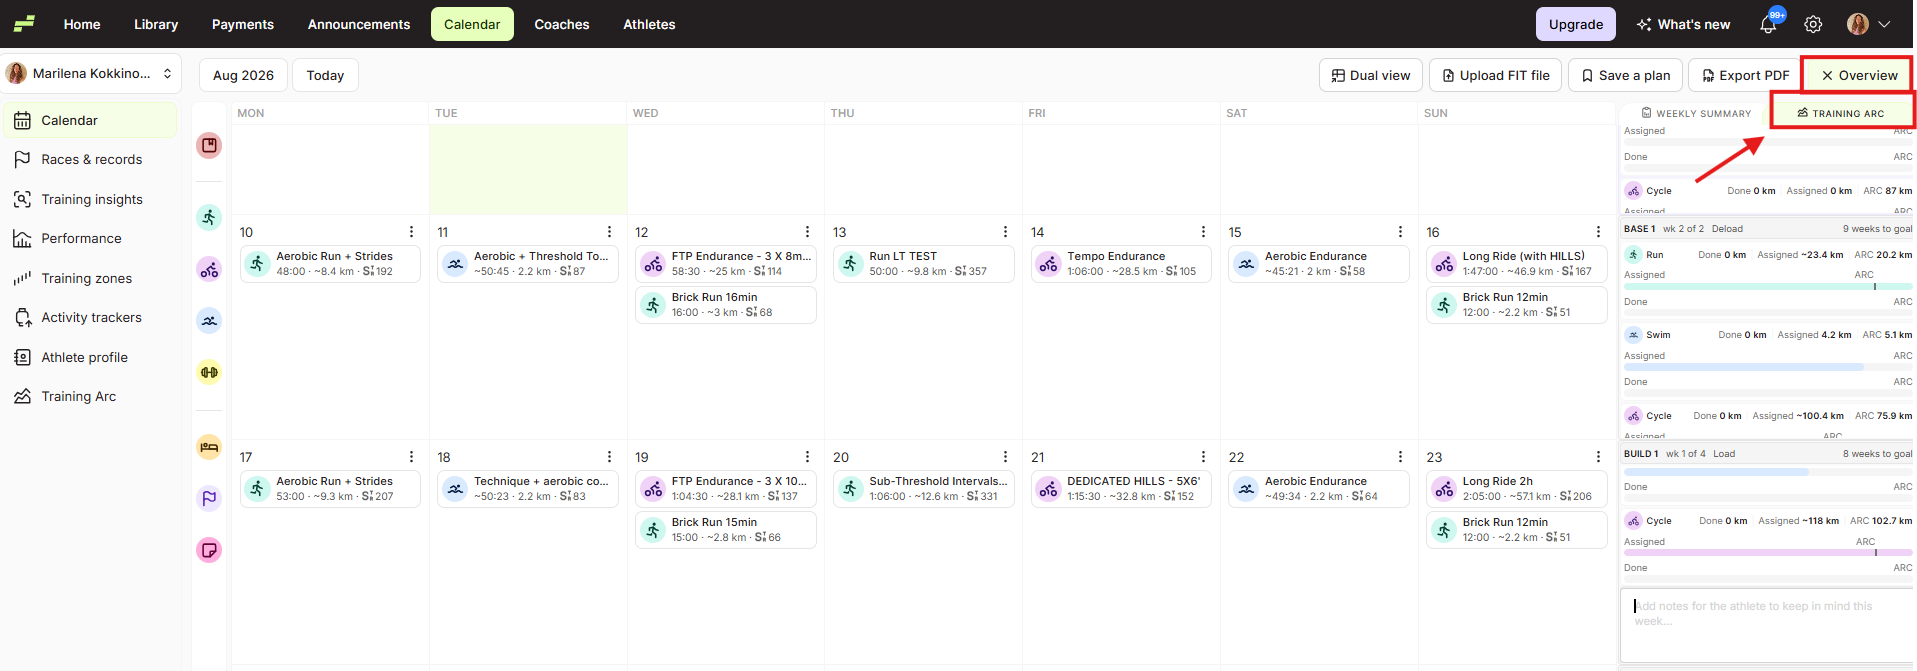
On the Calendar, click "Overview" at the top right to open the side panel, then select the "Training Arc" tab (next to "Weekly Summary").
Step 10: Read the Weekly Progress
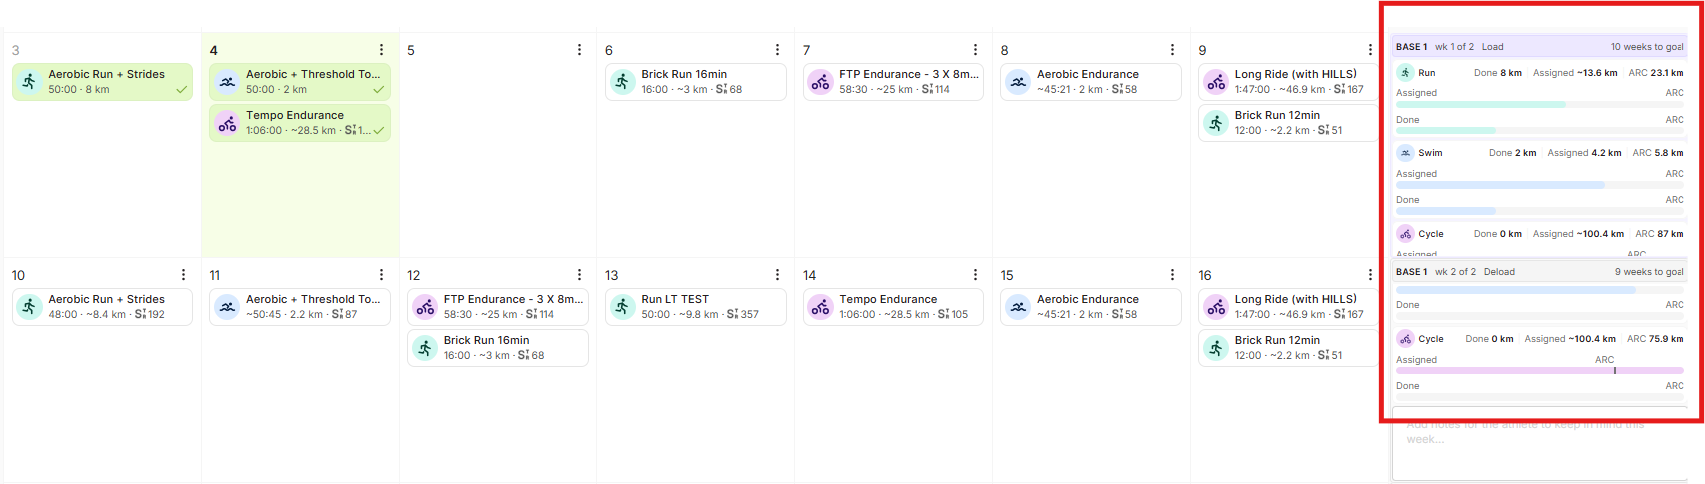
Each week in the panel shows three numbers per sport:
- Done: the volume your athlete has completed so far that week.
- Assigned: the volume you have scheduled on the calendar for that week.
- ARC: the target volume the Training Arc set for that week.
Progress bars under each sport make it easy to spot weeks where the assigned load falls short of, or overshoots, the Arc target. Each week also shows its phase and position, for example Build 1, wk 2 of 4, whether it's a Load or Deload week, and how many weeks remain to the goal. You can also add notes for the athlete to keep in mind that week in the notes field at the bottom of each week block.
Tips for Coaches
- Let the Arc set the ceiling, not the sessions. The Arc defines weekly volume targets per sport. You still decide the individual workouts, so use the ARC column as your weekly budget when scheduling.
- Use Priority A for the race that drives the Arc. The Arc builds backward from the target race, so pick the season's key event as the goal and keep tune-up races as Priority B or C.
- Check the panel before you plan each week. A quick glance at Assigned vs ARC tells you whether the week you just built matches the plan, before your athlete ever sees it.
- Open-ended cycles work for the off-season. No race on the horizon? Use an Open-ended Cycle to keep structured loading and deloading through base training.
- Edit weeks, not the whole Arc. Life happens. If one week needs less volume, edit that week's values directly instead of regenerating the entire Arc.
Need help? Contact us at Support & Feedback or browse the Knowledge Base.